Our experiments with AutoNLP
Categories:
When Huggingface announced AutoNLP, we were pretty excited and we just couldn’t wait to experiment with it. This post outlines what we tried and learned by using 🤗 AutoNLP.
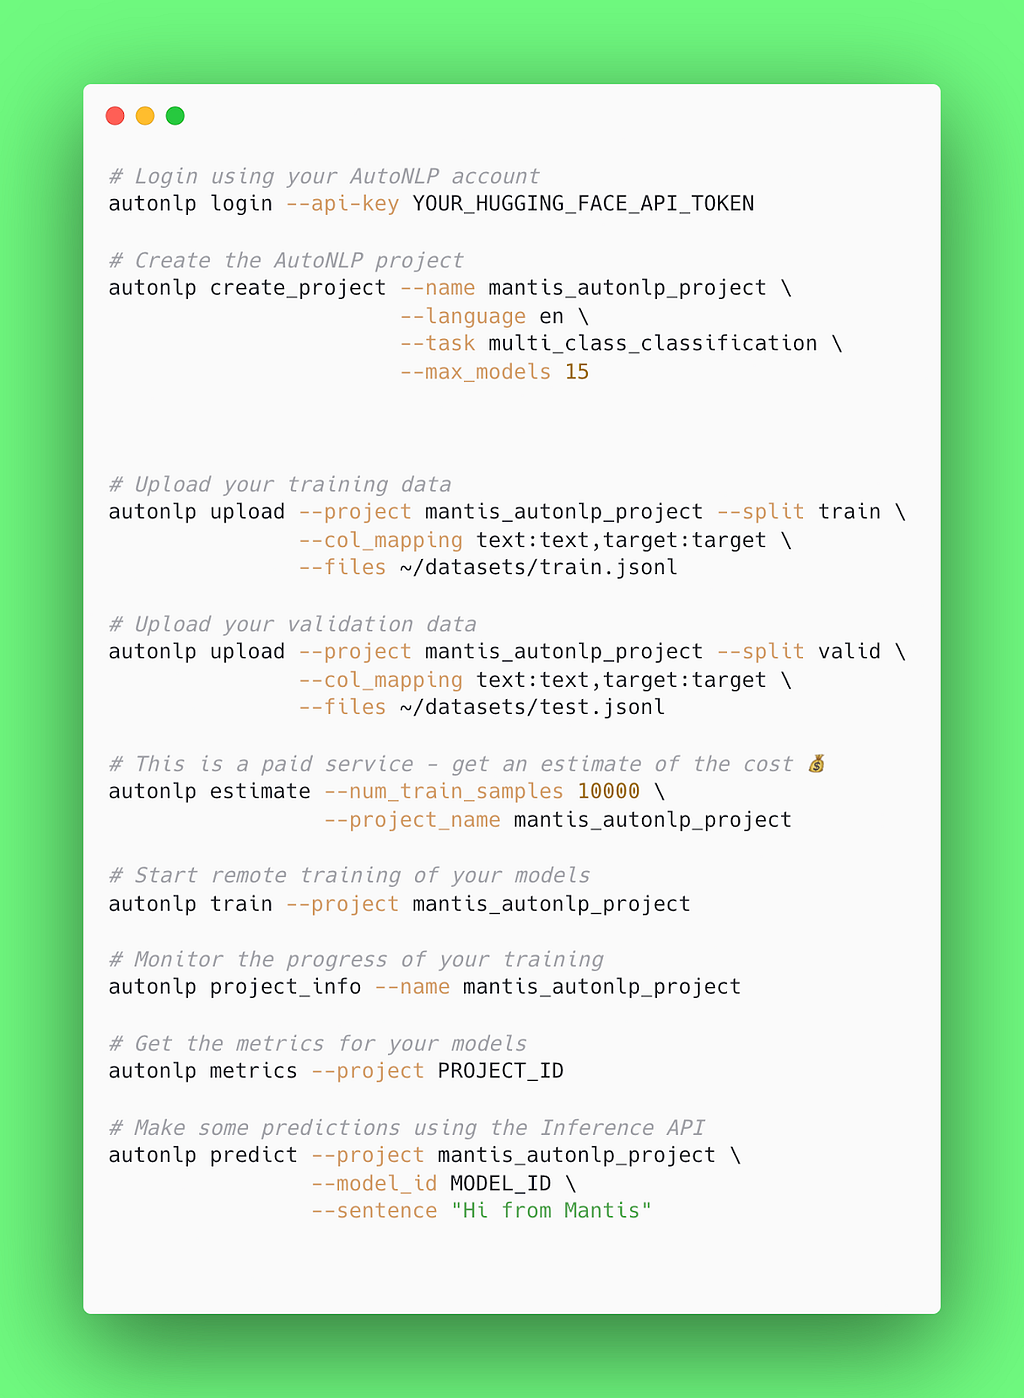
One way to use AutoNLP is to install the autonlp library. The steps required for training the models, monitoring them, getting the metrics and making predictions are summarized in the code snippet below.
Steps required for running an AutoNLP experiment in Huggingface 🤗
The task is multiclass classification and our dataset contains phrases that are common in a medical examination setting, together with the associated class. The data are stored in a newline delimited JSON, or jsonl format — an example is in the snapshot below. You can read more about this data format here.
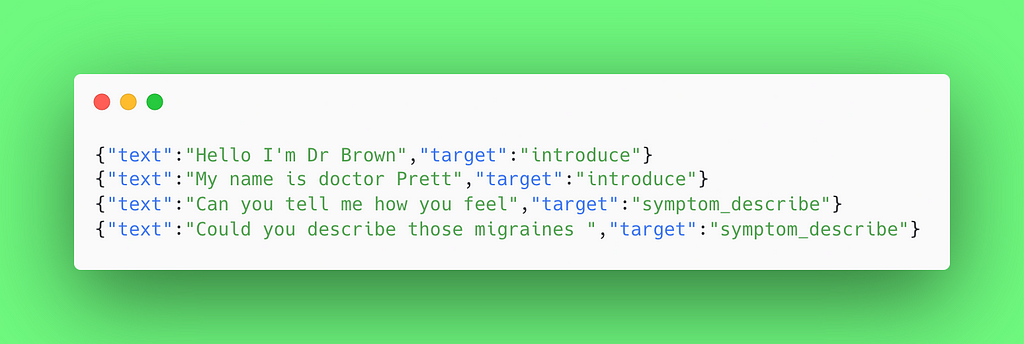
Data in jsonl format
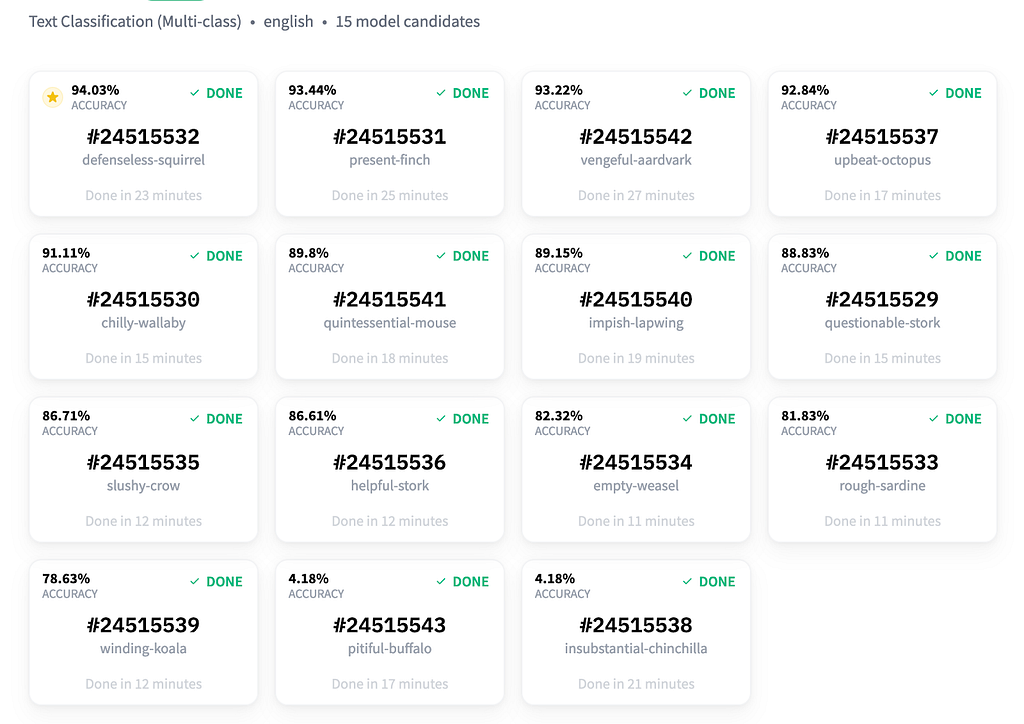
After AutoNLP finished training the models, we found a nice report waiting for us at: https://ui.autonlp.huggingface.co/. The report shows the models that were automatically trained together with their corresponding accuracy, a number identifying the run, the name given for the run and the training time. More metrics are found by clicking on the “metrics” tab.
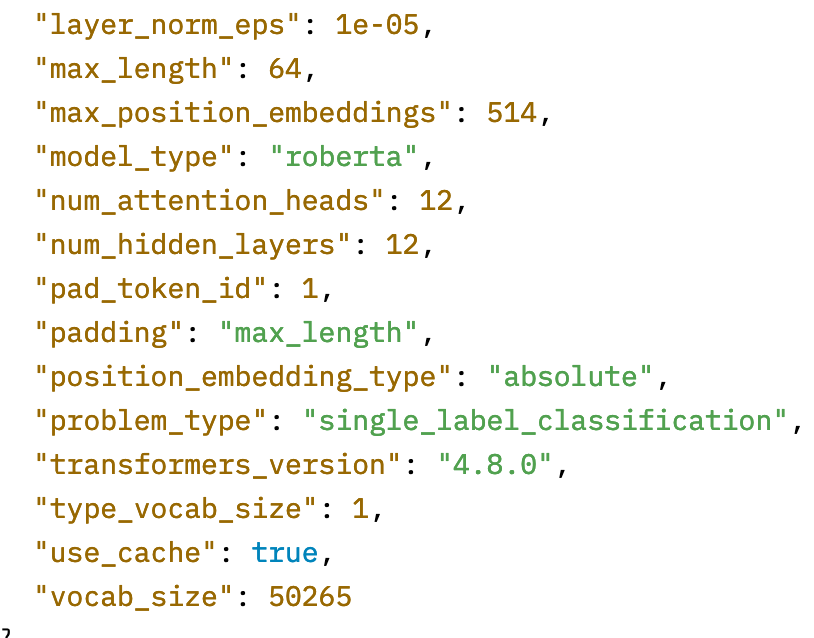
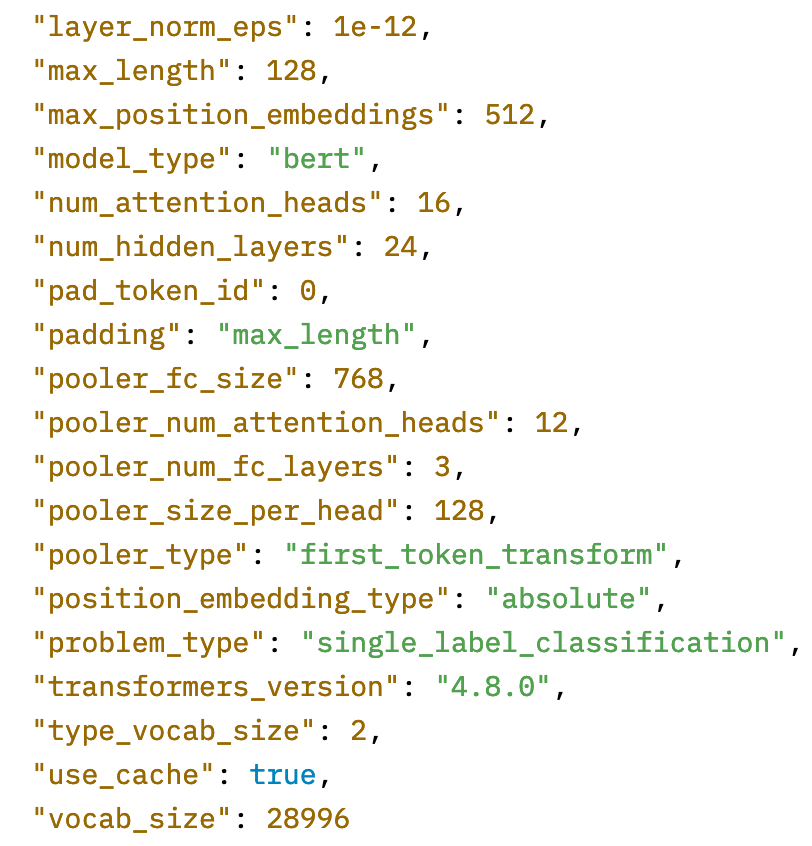
This interface is two clicks away from viewing the models in the Model Hub. By clicking on one of these model candidates you can then click again to view them in the Model Hub. By clicking on the “Files and Versions” tab in the Model Hub and then opening the config.json, you can get more information about the models. For example, the highest-accuracy model defenseless-squirrel is “bert” while the fourth one in the accuracy ranking — the upbeat-octopus — is “roberta”. The third one, the vengeful-aardvark, is also a “bert” with different hyperparameters.
AutoNLP runs multiple types of transformers models with multiple hyperparameters and outputs a report of the best performing models, together with the models for you to further fine-tune or deploy.
Rank 1 — bert
Rank 4 — roberta
Rank 3 — bert
So now we got insights about the best performing models and information about their hyperparameters. In addition, we got a deployable model, essentially in no time.
What is missing is the full set of parameters required to replicate the model training. For example learning rate, batch size, number of epochs, and steps are missing. However, these parameters are easy to reverse-engineer by trying some sensible parameters, for example, the ones given in the BERT paper. We can then easily take that model and further fine-tune it in AWS Sagemaker or locally if we wish to do so (https://hackernoon.com/how-to-fine-tune-a-hugging-face-transformer-model-581137q7).
What was really fascinating was that the best performing model trained by 🤗 AutoNLP achieved a higher accuracy than the ones we trained manually.
In addition, there were a lot of things that we didn’t needto worry about:
- Model selection
- Hyperparameter tuning
- Batch size
- Learning rate
- Tokenizer selection
You can also have a look at the twiml AI podcast (https://twimlai.com/shows/) where Abhishek Thakur (one of the initiators and core developers of the project) talks about AutoNLP here. Here is a part from the interview, reassuring you that you don’t need to worry about anything when running an AutoNLP project 😎. We feel the same.
Conclusion
Any tool providing automation in a machine learning workflow is interesting and welcome. For Mantis, 🤗 AutoNLP can help with something very important: getting baseline models lightning fast. This can be a tremendously valuable addition to an NLP workflow, especially when starting out with new projects. We will keep an eye on AutoNLP and keep experimenting further to explore its limits and usefulness. Stay tuned!
Our experiments with 🤗 AutoNLP was originally published in MantisNLP on Medium, where people are continuing the conversation by highlighting and responding to this story.

